
Steps for Aligning Twin Discs During Installation
Upgrading your vehicle with a twin disc clutch represents a significant milestone in your pursuit of automotive performance. A twin disc clutch system operates differently from the single disc unit you are likely replacing. Because it utilizes multiple friction surfaces and a floating mid-plate, aligning the components is not just a suggestion; it is a critical requirement. A misaligned clutch prevents the transmission input shaft from sliding home, leads to potential damage to the pilot bearing, and can cause shifting issues or premature wear. Below, we’ll lay out the steps for aligning twin discs during installation so your new clutch operates at maximum performance.
What Are Twin Disc Clutches?
A twin disc clutch is exactly what the name implies: a clutch system that utilizes two friction discs instead of one. Between these two discs lies a mid-plate, often called a floater. This design allows for a massive increase in surface area for the friction material to grip without requiring a physically larger clutch diameter. By doubling the friction surfaces, manufacturers can significantly increase the clutch's holding capacity.
Clutch Masters takes this concept further by engineering dual disc clutch systems like the 725, 850, and 1000 Series to handle tremendous torque loads while maintaining a pedal feel that is manageable for the driver. We achieve this by increasing the clamping force of the pressure plate and using materials like billet aluminum for the cover assembly. This material choice provides roughly 25 percent more tensile strength than a standard cast unit, eliminating flex and ensuring that every ounce of pedal effort translates directly to clutch engagement.
The Benefits of a Twin Disc Clutch for Your Car
The primary advantage of switching to a twin disc setup is the ability to hold more power. As you tune your engine and add forced induction or other power adders, a stock single disc clutch will eventually slip. It simply cannot generate enough friction to transfer that rotational force to the transmission. A twin disc system solves this by spreading the load across multiple plates.
Beyond raw holding power, Clutch Masters twin disc kits also deliver superior thermal capacity. The added mass and surface area dissipate heat more effectively than a single disc, a critical advantage during high-RPM shifts and aggressive track driving. The included SFI-spec billet aluminum flywheels guarantee safety and performance under extreme stress.
Preparing for Twin Disc Clutch Installation
A successful installation begins long before you pick up a wrench. First, gather all necessary tools and equipment for a smooth workflow. This includes a high-quality torque wrench, a transmission jack, socket sets, brake cleaner, clean rags, and the clutch alignment tool. A clean, well-lit, and organized workspace is also vital. Transmission removal creates a significant footprint, so confirm that you have ample room to work and a system for organizing bolts and hardware to avoid confusion during reassembly.
Before unbolting anything, verify that you have the correct twin disc clutch kit for your vehicle. Cross-reference the part numbers on the box with your build sheet and confirm the spline count on the clutch discs matches your transmission's input shaft.
How To Align Twin Discs
The steps for aligning twin discs during installation are relatively straightforward. With proper care, diligence, and tools, your new twin disc clutch will be ready to operate effectively.
Step 1: Preparation and Flywheel Installation
The process begins by removing the old clutch system. Once the transmission is out and you remove the old pressure plate and flywheel, inspect the engine's rear main seal. If it shows any signs of leaking, replace it. Thoroughly clean the crankshaft flange to ensure the new flywheel seats perfectly flat against the crank.
Next, install your new flywheel. Apply thread locker to the flywheel bolts and torque them to the manufacturer's specifications in a star pattern. This technique allows the flywheel to tighten evenly against the crank flange, preventing runout or vibration issues. Wipe down the flywheel's friction surface with brake cleaner one last time to remove any residual oils.
Step 2: Assembling the First Disc and Alignment Tool
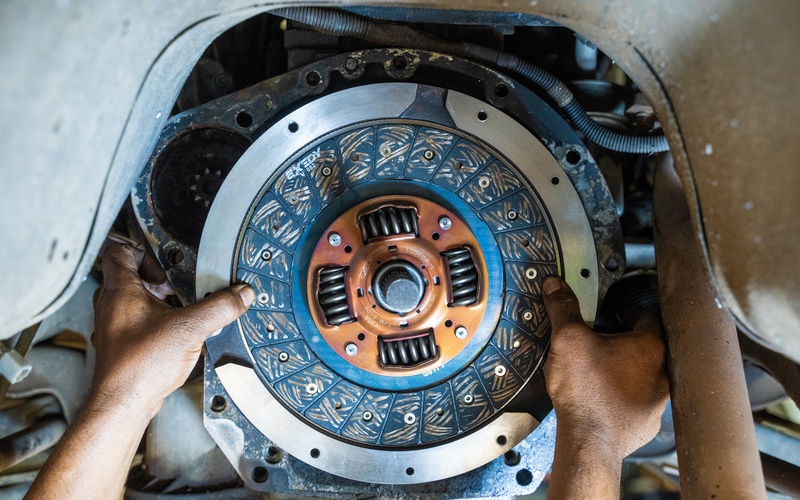
Now, you can begin building the clutch stack. Place the first friction disc onto the flywheel. Pay close attention to the hub orientation; typically, the sprung hub or marked side faces away from the flywheel, but always consult your specific installation manual for confirmation.
Once the first disc is in place, insert the alignment tool through the disc splines and into the pilot bearing in the crankshaft. This tool is essential, acting as a guide to perfectly center the disc while you assemble the rest of the system.
Step 3: Installing the Mid-Plate and Second Disc
With the alignment tool holding the first disc steady, slide the mid-plate (also known as the floater plate) onto the flywheel's drive stands or studs. The mid-plate must slide freely without binding. If it catches, inspect for burrs or debris.
Next, slide the second friction disc onto the alignment tool, again verifying the hub's orientation per the manual. The alignment tool should now pass cleanly through the second disc, the mid-plate, and the first disc, anchoring firmly into the pilot bearing.
Step 4: Mounting and Torquing the Pressure Plate
Finally, install the pressure plate cover assembly. Position it over the studs and align it with the flywheel dowels. Hand-tighten the pressure plate bolts first to seat the cover evenly. Then, utilizing the star pattern again, progressively torque the bolts to the recommended specification.
As you tighten the pressure plate, periodically wiggle the alignment tool. It should slide in and out with minimal resistance. If the tool binds or becomes difficult to remove, the discs are shifting out of alignment. In this case, loosen the bolts, re-center the tool, and repeat the tightening process.

Final Checks and Adjustments
Before reinstalling the transmission, confirm proper disc alignment by removing the alignment tool and inspecting the splines to confirm that they are concentric with the pilot bearing. Re-insert the tool to verify smooth engagement. After securing the transmission, focus on adjusting the hydraulics. Twin disc clutches often require different pedal height and free-play settings than stock units, so consult the instructions for precise adjustments.
Test the clutch engagement by starting the vehicle on jack stands or with a cautious initial drive. Listen for unusual noises and confirm smooth engagement and disengagement. Verify that everything functions properly before attempting high-RPM driving.
Optimize Your Car With Clutch Masters
Proper alignment serves as the foundation for your new twin disc clutch's performance. Rushing the installation can compromise even the most advanced engineering, leading to poor drivability or damaging components. By taking the time to clean your workspace, torque fasteners correctly, and verify alignment at every stage of the stack-up, you guarantee your vehicle is ready to handle greater power.
We encourage you to explore the full range of Clutch Masters twin disc clutch systems. Whether you are building a dedicated drag car with the 725 Series or a high-horsepower daily driver with the 850 Strapped kit, there is a solution for your specific needs. Upgrade your connection to the road and feel the difference that precision engineering makes.