
Flywheel Removal Tips for Tight Engine Bays
Any automotive enthusiast knows the frustration of a cramped engine bay, which becomes a significant hurdle for major driveline modifications like a flywheel replacement. Upgrading your factory unit is critical for transferring power from the engine to the transmission, yielding massive dividends in throttle response and acceleration. In this guide, we offer helpful flywheel removal tips for those working within tight engine bays.
Understanding the Role of the Flywheel
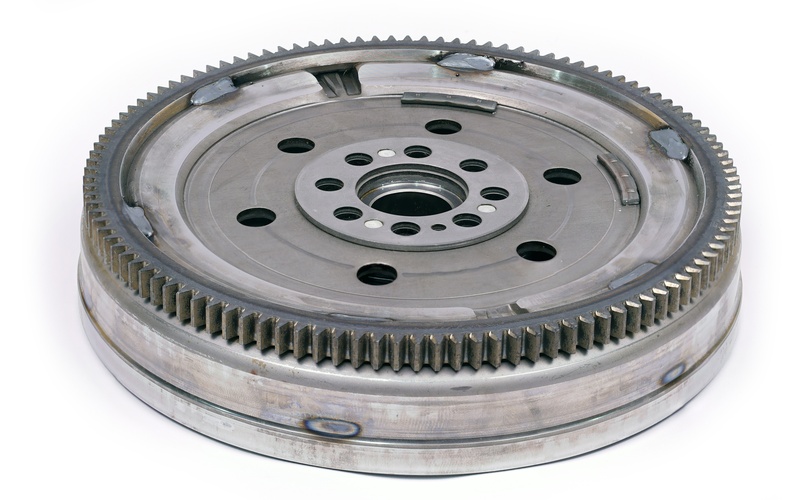
Before you start tearing into the transmission tunnel, you must understand exactly what you are removing. The flywheel acts as a mechanical battery, storing rotational energy to keep the engine spinning smoothly between combustion strokes. It also provides a friction surface for the clutch disc to grab onto, allowing power transfer to the wheels.
Manufacturers produce flywheels in various configurations and materials. The two primary designs you will encounter are Single-Mass Flywheels (SMF) and Dual-Mass Flywheels (DMF). A DMF consists of a flexible compound or springs connecting two concentric parts. This design dampens engine vibration and gear rattle for a smoother passenger experience, but it comes with significant performance downsides. DMFs are heavy, expensive to replace, and you cannot resurface them.
Essential Preparation for Flywheel Removal
Success in a tight engine bay begins with preparation. You need to gather all necessary tools before you slide under the chassis, because climbing out repeatedly wastes valuable energy. You will need a comprehensive set of metric sockets and wrenches, specifically in the 10mm to 19mm range, along with various extensions and swivel joints to reach obscured bolts. An impact wrench serves as your best friend for breaking loose stubborn fasteners, provided you can fit it into the space. You also absolutely need a flywheel holding tool or a way to lock the engine, as you cannot loosen flywheel bolts on a spinning crank.
Safety remains the highest priority. Always wear eye protection to shield against falling debris and rust. High-quality mechanic gloves will protect your knuckles from the inevitable scrapes of working in tight clearances. Before touching a single bolt on the bellhousing, disconnect the negative battery terminal to prevent accidental electrical shorts.
Navigating the Removal in a Compact Engine Bay
Removing a flywheel in a tight engine bay is difficult, but we have some tips to help you out. Keep reading to understand how to best access the flywheel, how to counter-hold the flywheel while applying torque to the bolts, and how to deal with rusty hardware.
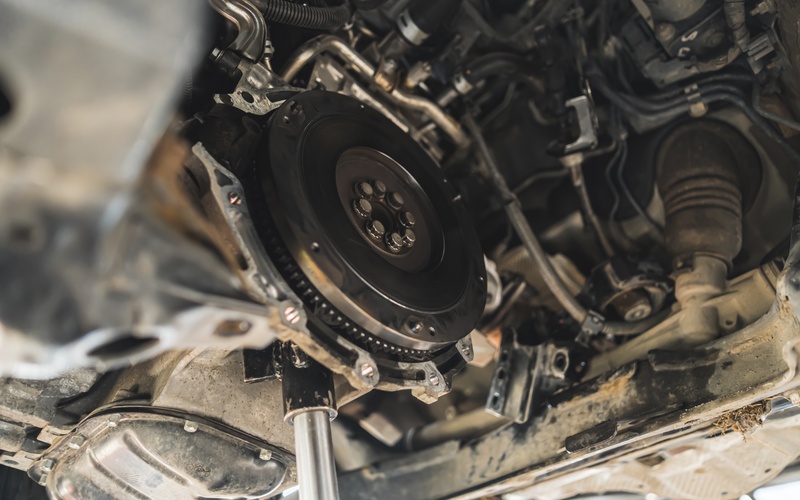
Accessing the Flywheel
The first, and typically the most labor-intensive step of the removal process, is removing the transmission to access the flywheel. In a cramped engine bay, you may need to remove intake piping, the starter motor, and even exhaust headers to create enough clearance to separate the gearbox from the engine. Once you expose the pressure plate and clutch disc, remove them to reveal the flywheel bolts.
Counter-Holding Techniques
The biggest challenge in a tight space is counter-holding the flywheel while you apply torque to the bolts. The engine will naturally want to turn over as you wrench on it. If space allows, install a flywheel locking tool into the ring gear teeth.
If the bay is too tight for a commercial tool, you may be able to thread one of the transmission bellhousing bolts back into the engine block and use a pry bar leveraged against the ring gear teeth to hold it stationary. Another method involves having a helper place a breaker bar and socket on the crank pulley bolt at the front of the engine to hold the assembly still, though this requires access to the front of the engine block.
Dealing with Rusted Hardware
One of the biggest problems for many removal projects is dealing with rusty or stuck bolts. When you cannot fit a large impact gun into the tunnel, you must rely on leverage and chemistry. Apply a high-quality penetrating oil to the bolt threads and let it soak.
If a bolt refuses to budge, careful application of heat to the bolt head can break the thread locker's bond. However, be extremely cautious with heat near the rear main seal to avoid damaging the rubber. A long breaker bar or a "cheater pipe" slid over your ratchet handle may provide the necessary leverage to crack the bolts loose.
Conducting a Post-Removal Inspection
With the old flywheel out of the way, you have a rare opportunity to inspect components that you cannot typically see. Check the engine's crankshaft flange for any burrs, rust, or damage that could prevent the new flywheel from seating flush. You must clean this surface thoroughly with brake cleaner and a scouring pad.
You should also inspect the rear main seal for any signs of oil leakage. If you see even a hint of oil, replace the seal immediately. A leaking rear main seal can contaminate your new clutch disc and ruin its friction material, forcing you to redo the entire job.
Selecting the Right Replacement
Choosing the correct flywheel depends on how you use your vehicle. A Clutch Masters lightweight flywheel reduces parasitic losses, allowing the engine to use less energy to spin the flywheel and send more power to the wheels. This results in quicker revs and greater torque in naturally aspirated engines. For forced-induction applications, a lighter flywheel helps the engine build RPM faster, reducing turbo lag and increasing supercharger efficiency.
Safety also helps drive this decision. Factory flywheels, especially cast iron ones, can explode under high-RPM stress. All Clutch Masters flywheels are SFI-certified, meaning they meet rigorous performance standards for the automotive and motorsport industries. Whether you choose the 6061 T6 Billet Aluminum for raw speed or the 4140 Billet Steel for indestructible durability, you are installing a part engineered for excellence.
Critical Installation Tips
When installing the new flywheel, you must correctly align the flywheel dowel pin with the crankshaft. Once seated, use new flywheel bolts. Factory bolts are frequently "torque-to-yield," meaning they stretch during installation, and you cannot reuse them. Apply a high-strength thread locker, such as Red Loctite, to the threads to prevent them from backing out under vibration.
Tighten the bolts in a star or cross pattern to seat the flywheel evenly against the crankshaft. Step up the torque in increments—for example, torque all bolts to 30 ft-lbs, then 50 ft-lbs, and finally to the manufacturer's specified setting. This even pressure prevents the flywheel from warping. Finally, clean the friction surface of the new flywheel with brake cleaner one last time to remove any oils from your hands or the manufacturing process before installing the clutch disc.
Driving Performance Forward
Do not let a cramped engine bay deter you from upgrading your car. With the right preparation, tools, and technique, you can master the tight squeeze and elevate your driving experience. Visit the Clutch Masters website today to find the perfect aluminum or steel flywheel for your specific application and take the first step toward unmatched performance.